mistakes to avoid
Why do my customers say the beef comes out watery after they reheat my frozen entrees?
Ice crystal size, sauce thickeners that break, undercooked vegetables and overfilled pans all show up at the customer oven. The freeze side causes and the fixes that hold.
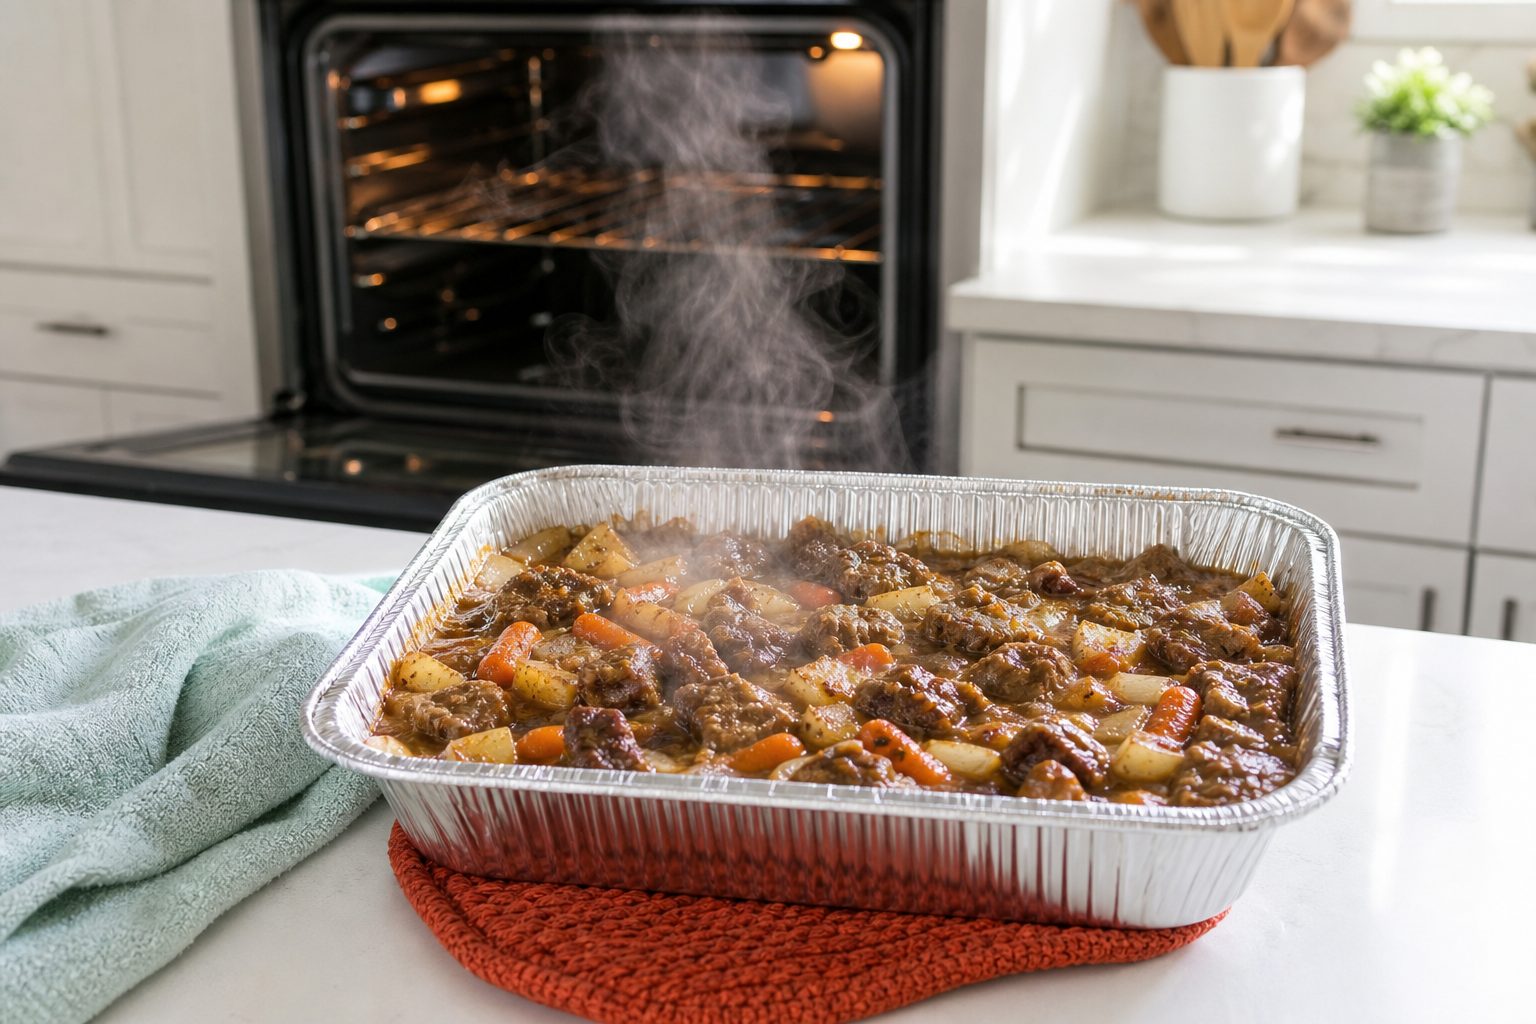
Watery beef almost always means water that was inside the muscle is now outside it. Freezing turns the water in meat into ice crystals, and if that freeze happens slowly, the crystals grow large enough to puncture cell walls. On thawing, the cells cannot hold their moisture back, so it runs into the pan and dilutes whatever sauce you built. Your customer reads that as watery. What actually happened is that your product spent too long between 28 and 15 degrees Fahrenheit.
The second cause is thickener choice. Ordinary cornstarch and wheat flour roux gels retrograde and weep during freeze thaw, releasing liquid that was bound at packing time. The third is vegetables, which arrive with more water than the dish can absorb and give it up on reheat. The fourth, and the one nobody suspects, is the reheat instruction itself, which often tells a customer to bake from partly thawed with foil on, steaming the dish rather than driving moisture off.
Four causes, four different fixes. Here is how to find yours.
Slow freezing, large ice crystals and cell rupture in proteins
The zone of maximum crystal formation for most foods sits roughly between 31 and 14 degrees Fahrenheit. The faster you cross it, the smaller the crystals. Small crystals sit inside cells and do little damage. Large crystals form between cells, draw water out osmotically, and shred the structure they grew in.
Beef and pork are worse affected than chicken breast at a given freeze rate because of muscle fiber structure and higher intramuscular fat interfaces, and anything you have already brined or marinated in salt has more free water available to freeze.
The practical test is a stopwatch, not a thermometer alone. Put a probe in the geometric center of a packed portion, log the time it takes to travel from 31 degrees to 14 degrees, and write that number down. If it takes more than about 90 minutes, you have a crystal problem and no amount of sauce work will fully hide it.
Keep reading: How does a small kitchen safely serve a family with a peanut and dairy allergy every week?
Blast chilling versus a home style freezer and what pan depth changes
A blast chiller moves cold, fast moving air across product and pulls the center down in a fraction of the time a static freezer needs. A home style chest freezer holds product frozen very well. It is a poor tool for making product frozen, because a full load of warm pans raises the cabinet temperature and every pan then freezes slowly, together.
You may not have a blast chiller. You can get most of the benefit for the price of pans and shelf discipline.
- Cut depth. Freezing time rises roughly with the square of thickness. Halving pan depth from two inches to one cuts freeze time by far more than half. This is the single highest return change available to a small kitchen.
- Chill before you freeze. Get product from 135 to 70 degrees within two hours and to 41 within a further four, using shallow pans and an ice paddle. A warm pan entering the freezer is a slow pan and a hazard to everything around it.
- Freeze uncovered and unstacked, then stack. Air has to touch the surface. A stack of six pans is one thermal brick.
- Leave finger gaps. Two inches between pans on the rack, nothing against the back wall, nothing blocking the evaporator.
- Load in waves. Freeze the batch in two loads rather than filling the cabinet at once.
Confirm with the stopwatch test above. Operators who do only the pan depth change often halve their freeze time and see the beef issue drop off without touching a recipe.
Starches and thickeners that survive a freeze thaw cycle
Native cornstarch is a retrograding starch. Its amylose molecules realign during frozen storage, squeeze out the water they held, and leave a broken, thin sauce with a puddle. Wheat flour roux behaves similarly, though the fat in a roux buys a little tolerance.
| Thickener | Freeze thaw behavior | Use in a frozen entree |
|---|---|---|
| Native cornstarch | Retrogrades, weeps badly | Avoid as sole thickener |
| Wheat flour roux | Weeps moderately, texture goes grainy | Acceptable with added fat and short frozen life |
| Modified waxy maize starch | Formulated for freeze thaw stability | The workhorse for sauced entrees |
| Tapioca starch | Good stability, glossy, slightly stringy at high use | Good for fruit and lighter sauces |
| Roasted vegetable or potato puree | Body without starch gel | Excellent for stews, adds flavor |
| Reduced stock with gelatin body | Very stable, sets and remelts cleanly | Best answer for braises |
The single most reliable change for a beef dish: stop thickening it and start reducing it. A stock reduced until it is glossy carries its own body from collagen, and collagen gelatin does not retrograde. It costs you time on the stove and buys you a sauce that comes back exactly as it went in.
If you must use starch, ask your distributor specifically for a modified waxy maize starch labeled freeze thaw stable, and hydrate it fully at temperature before packing. An undercooked starch slurry will also weep, freezing aside.
Keep reading: How did one kitchen grow from twelve boxes to a hundred without hiring a second cook?
Vegetables that weep and the blanching step that stops it
Raw vegetables put into a frozen entree carry active enzymes and full cell turgor. Both work against you. Enzymes keep degrading texture and flavor at freezer temperature, slowly, and rupture on freezing releases their water into your sauce.
The offenders, ranked by how much water they will hand you: zucchini and summer squash, mushrooms, spinach and other tender greens, bell peppers, tomatoes, cabbage. Root vegetables, winter squash, corn and peas behave far better.
The blanch and dry sequence
- Boil in salted water, or steam, only until the vegetable loses its raw bite. For green beans that is around three minutes, for diced carrots around two, for chopped spinach under one.
- Shock immediately in ice water. Not cold tap water. The goal is to stop cooking within seconds.
- Drain hard, then dry. Spin greens, press spinach in a clean towel, spread diced vegetables on a sheet pan and let surface water evaporate.
- Cool fully before it meets the sauce, so you are not raising the batch temperature.
For mushrooms, skip blanching and dry saute them first in a hot dry pan until they squeak and release their water, then finish with fat. A mushroom will give up 60 to 80 percent of its weight as water if you let it, and better in your pan than in the customer's oven.
Headspace, seals and freezer burn in the container you chose
Freezer burn is sublimation. Ice on the surface moves directly to vapor, migrates to the coldest surface in the package, and refreezes there as frost. The product loses water and the customer gets dry patches next to a pool of melted frost.
Three rules that hold across container types. Minimize air in contact with the food, because that air is where the moisture goes. Use a barrier the vapor cannot cross, which means a proper film seal or a vacuum pack rather than a loose lid. And keep the storage temperature steady, because every defrost cycle in a self defrosting freezer drives another round of sublimation.
Leave enough headspace for expansion in liquid heavy items, around half an inch on a quart, and no more. In a tray with a heat sealed film, press the film to the product surface where you can. A sheet of parchment or film laid directly on a sauced surface before the lid goes on is a cheap and effective barrier.
See how FreezerFive handles this for meal prep and freezer meal businesses
Writing reheat instructions that match how people really cook
Your customer will not follow a four step instruction. She will pull the tray out at 5:40, put it in the oven, and open it when the timer goes.
Instructions that cause watery results: bake covered for the whole time, which traps every bit of released steam. Bake from frozen at a low temperature, which extends the time the product sits in the range where thawed liquid pools. Microwave a sauced entree on high, which boils the sauce and breaks the emulsion.
Instructions that work, and that you should test before printing:
- Thaw overnight in the refrigerator when the dish is sauce heavy. Thawed reheating is faster, more even and less watery than from frozen, and the customer only has to remember one thing.
- Bake covered for the bulk of the time, then uncover for the last 10 to 15 minutes at a hotter oven so surface moisture drives off and the top browns.
- State an internal temperature endpoint of 165 degrees Fahrenheit rather than a time alone.
- For microwave, specify a reduced power level and a stir partway, not high for eight minutes.
- Say what the dish should look like when done. "The sauce should be bubbling at the edges" tells her more than a clock.
Running a monthly thaw and taste test on your own inventory
You cannot fix what you do not taste. Once a month, pull one unit of every SKU currently in your freezer, from the oldest lot code you still hold, and reheat it exactly the way your label tells the customer to. In her oven conditions, not on your stovetop.
Score four things on a simple sheet: free liquid in the pan after reheating, sauce cling on a spoon, protein texture, and vegetable texture. Note the lot code, the pack date and the days frozen. Three months of that sheet will tell you what your real shelf life is and which recipe is quietly failing at week eight.
This is also how you set the Best Quality By date honestly instead of copying a number from a competitor. The date is whatever your own panel says, minus a safety margin.
The fix that outlasts a single recipe change
Most watery entree problems come down to a process drifting rather than a recipe being wrong. Pans get filled deeper on a busy week. A batch gets doubled and the freeze time doubles with it. A vegetable gets added raw because the blanch station was backed up.
Consistent scaling is what keeps that from happening. When the week's orders drive the batch sizes, and the batch sheet tells you the pan count and the pounds of chicken to thaw before anyone starts prepping, the pan depth stays where you tested it. FreezerFive builds that scaling and the pick list from the orders you actually took, so the process you validated in a taste test is the process that runs on a Thursday when the kitchen is full.
Read also
How does a small kitchen safely serve a family with a peanut and dairy allergy every week?
Allergen segregation is scheduling, storage and cleaning more than it is recipes. How working kitchens sequence production, verify labels and communicate risk to a repeat allergy household.
How did one kitchen grow from twelve boxes to a hundred without hiring a second cook?
Batch consolidation, a fixed four week menu rotation, sub recipe prep days and a single pick list did most of the work. A close look at what changed and what stayed the same.

Is demand for weekly freezer meal delivery still growing in mid sized American towns?
National meal kit brands have retreated from thin markets while local frozen delivery has held ground. What is driving that split and what it means for a kitchen serving one metro area.